GIFs for a GitHub README: the 10 MB limit, and how to keep UI captures crisp
A demo GIF is the single most useful thing in a README, and the 10 MB attachment limit is the wall everyone hits. Here is the limit from GitHub’s own docs, the two ways to add a GIF, and the settings that keep interface text readable.
The limits, from GitHub’s docs
| What | Limit | Source |
|---|---|---|
| Image or GIF attached to an issue, pull request or comment | 10 MB | GitHub Docs — Attaching files “10MB for images and gifs” |
| Other attached files | 25 MB | GitHub Docs — Attaching files “25MB for all other files” |
| File committed to a repository (a GIF linked from a README) | 100 MiB hard block; warning above 50 MiB; 25 MiB when uploading through the browser | GitHub Docs — About large files on GitHub “GitHub blocks files larger than 100 MiB.” |
| README rendering That is the README text itself, not the images it links to. | content beyond 500 KiB is truncated | GitHub Docs — About READMEs “When your README is viewed on GitHub, any content beyond 500 KiB will be truncated.” |
Two different limits apply depending on how you add the GIF, which is where the confusion comes from.
Two ways to put a GIF in a README
1. Attach it through an issue or comment, then paste the URL. Open any issue or pull request on the repository, drag the GIF into the comment box, and GitHub uploads it to github.com/user-attachments/… and inserts a Markdown image line. Copy that line into your README. The file never lives in your repository, so downloading the repository stays fast. This is the route with the 10 MB cap for images and GIFs. You don’t even need to post the comment; the upload happens as soon as you drop the file.
2. Commit the GIF into the repository (for example docs/demo.gif) and reference it with a relative path: . GitHub’s docs say relative paths are rewritten to work on any branch. The file limits are the repository ones (a warning above 50 MiB, a hard block at 100 MiB, 25 MiB through the browser), but the real cost is that every clone downloads the GIF forever, and every re-recorded version stays in the history. Keep committed GIFs small, or use route 1.
Whichever route you take, GitHub’s list of attachable image formats is PNG, GIF, JPEG and SVG plus MP4, MOV and WebM for video. Animated WebP isn’t on that list, so for a README, GIF is still the format that works everywhere.
Why README GIFs look soft
Most README GIFs are recorded at the app’s native size and then displayed at a fraction of it on a high-density screen. Two things blur interface text:
- Resampling. A 1920-px capture squeezed into a README column about 900 px wide is resampled by the browser, and on a Retina or 4K display it is resampled again to fill 1800 device pixels; either way, text edges go soft.
- Dithering. Dithering hides banding in photos and video by adding fine noise. On flat UI colours that noise is visible as speckle around text.
Our advice for app UI captures, from the measurements on this site, and how to do each in Simple GIF Maker:
- Crop to the part of the window that matters rather than shrinking the whole window. A 700-px-wide crop at 1:1 is sharper than a 1400-px window shrunk to 700. The crop tool has eight handles and free, 1:1, 16:9 and 4:3 presets.
- Keep the resolution, drop the frame rate. A UI demo reads fine at 10–12 fps; in our size tables, 10 fps is roughly 70% of the size of 15 fps at the same width. Tick Keep resolution and let the size target take the frame rate down.
- Turn dithering off for flat UI and let the colour count fall instead. Interface screens rarely need more than 64–128 colours, and no dithering means no speckle around text. That’s the None option in the palette and dithering panel; keep Sierra for video.
- Pause on the important frames. A GIF that lingers a second on the result compresses better than constant motion and is easier to follow.
A measured 10 MB fit
We ran the app’s command-line mode on a 10-second 1080p clip from Big Buck Bunny (Blender Foundation, CC BY 3.0), starting from 960 px wide at 24 fps and asking for 10 MB. On an 8-core desktop it took 43 seconds and reported:
960 -> 476px wide, 24 -> 13 fps, 256 -> 96 colors -> 8.86 MB (target 10.0 MB)
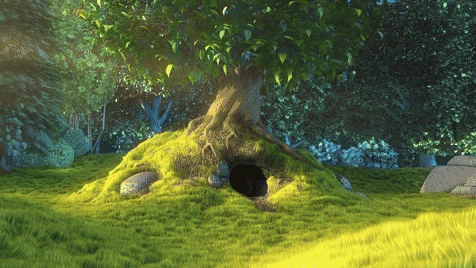
For a README capture you would set the target to 10 MB, tick Keep resolution, and export once. The preview the app shows is the real encoded GIF, so what you see in the app is what the README will show, and if it’s over the limit you’ll know before you upload. One-time purchase on Steam, for Windows and SteamOS/Linux.
Related guides
- GIF size limits for Discord, GitHub, Steam and Slack, checked against the official pages
The current GIF and file upload limits for Discord, GitHub, Steam store pages and Slack, each with a link to the official page and the date it was checked, plus how Simple GIF Maker hits any of them on the first try.
- How to make a GIF smaller: what each setting costs, measured on one clip
Why GIFs are so big, and what shrinking one actually costs: width, frame rate, colours, dithering and length measured on the same clip with real file sizes and crops. Then the one-step way with Simple GIF Maker's size target, including shrinking a GIF you already have.
- GIF vs animated WebP: measured sizes, and where each one actually plays
The same clip encoded as a GIF and as an animated WebP with Simple GIF Maker's pipeline, with real file sizes, plus a compatibility table for browsers, Discord and GitHub with sources and dates. When WebP wins, when GIF is still the safe choice, and how the app exports both.